
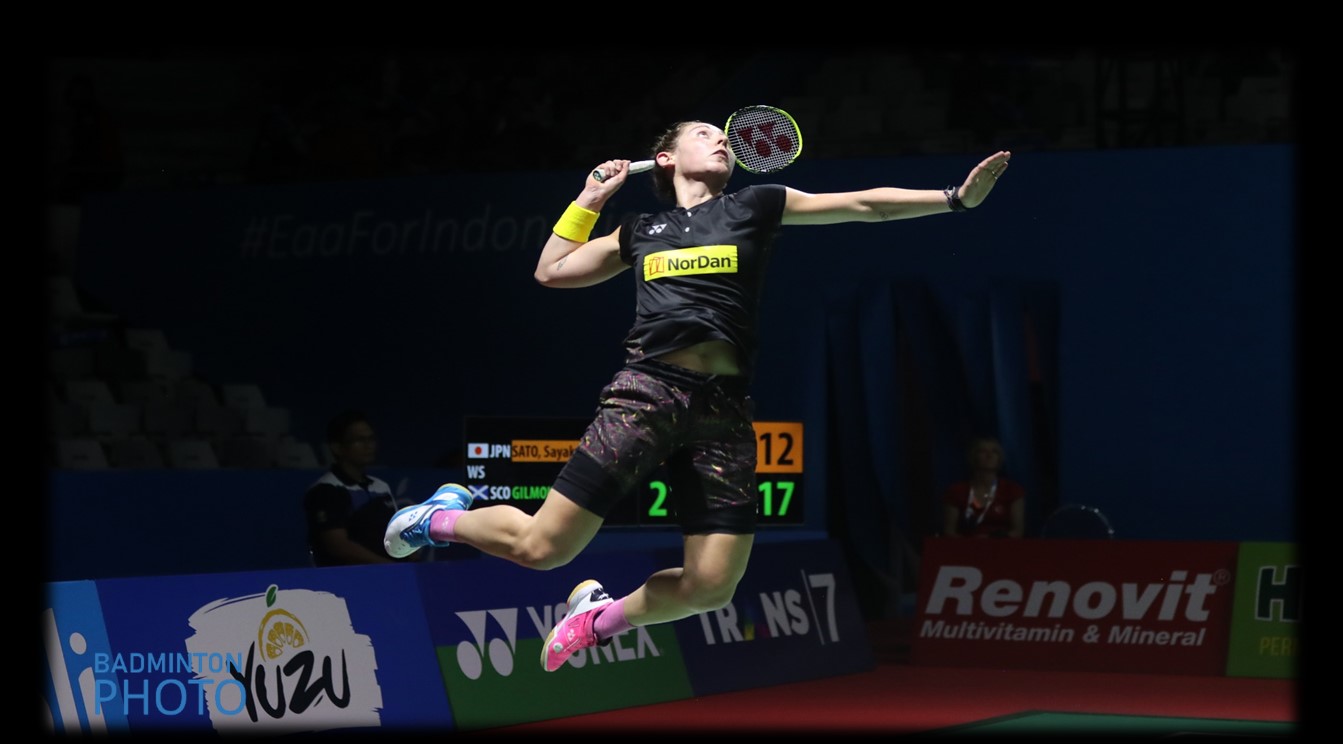
What are the essential elements to a geat jump smash
What can you do to jump higher and hit harder
How should you start, progress and practice
To achieve maximum height
be prepared to change your normal smash technique
The essential things that you should be doing
to jump higher and hit with power
Where and when to start
The good and bad news
The good news is that everyone has the ability to get off the ground and hit the shuttle.
The bad news is that the height you gain and what you are capable of doing in the air will vary.
Some of you will already have the components required to jump smash, others will need time and training, then the rest of us may need a miracle to jump like an expert.
I believe that everyone should be encouraged to “push up” off the court when smashing.
You should be encouraged from an early age to “get off the ground when smashing”.
If you want to know more about how to develop a great “normal” smash, then click on the image above or here.
There are some critical differences (technical things)
between jump smashing and ‘normal’ smashes
Novice players
The essential components that will help build a platform
- When first starting hitting overheads, you should be encouraged to “get off the ground”. The height is not important, just "push up" .
- Players should be encouraged to load their back leg. This can be by pushing into the court, allowing the front leg to come off the ground, or by encouraging a “pull-down of the elbow“.
- For a 'normal' overhead, get used to having wide legs just before take-off, wider than shoulder-width. This is NOT the position that your feet will be in for a Jump Smash (more about that later).
- Develop a “backward running” movement in preparation. This running type movement will help you prepare your legs. Not everything needs to be a chasse when moving.
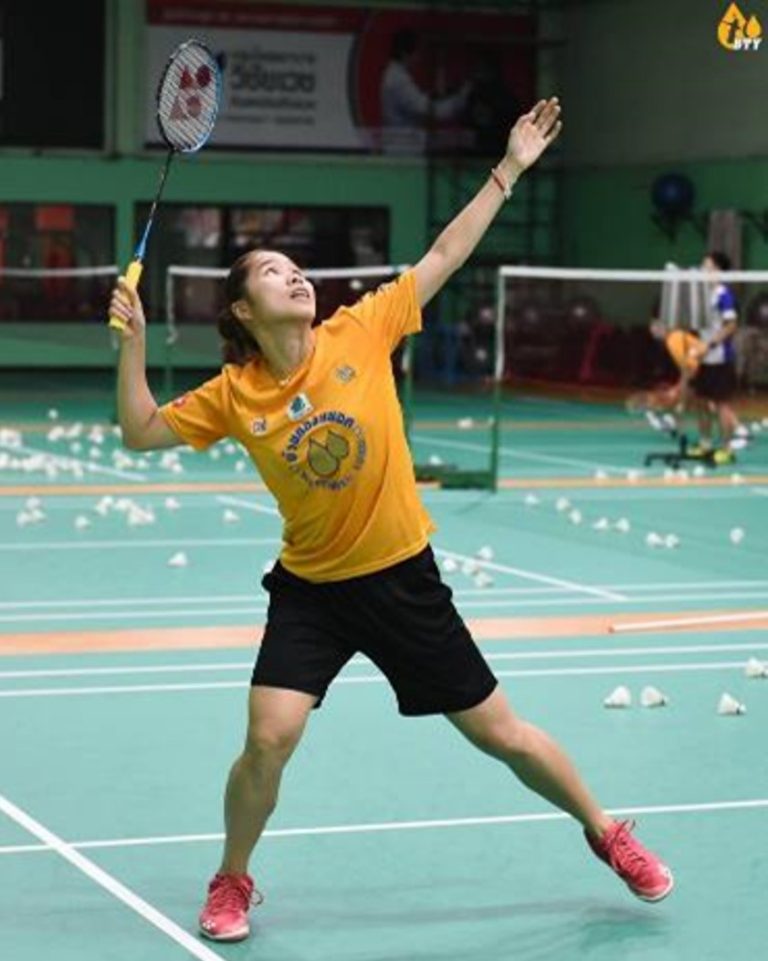
- Look at the pictures below and try to spot the differences.

How many differences can you see between these 2 preparations?
To develop a vertical jump smash be ready
to change some of your techniques
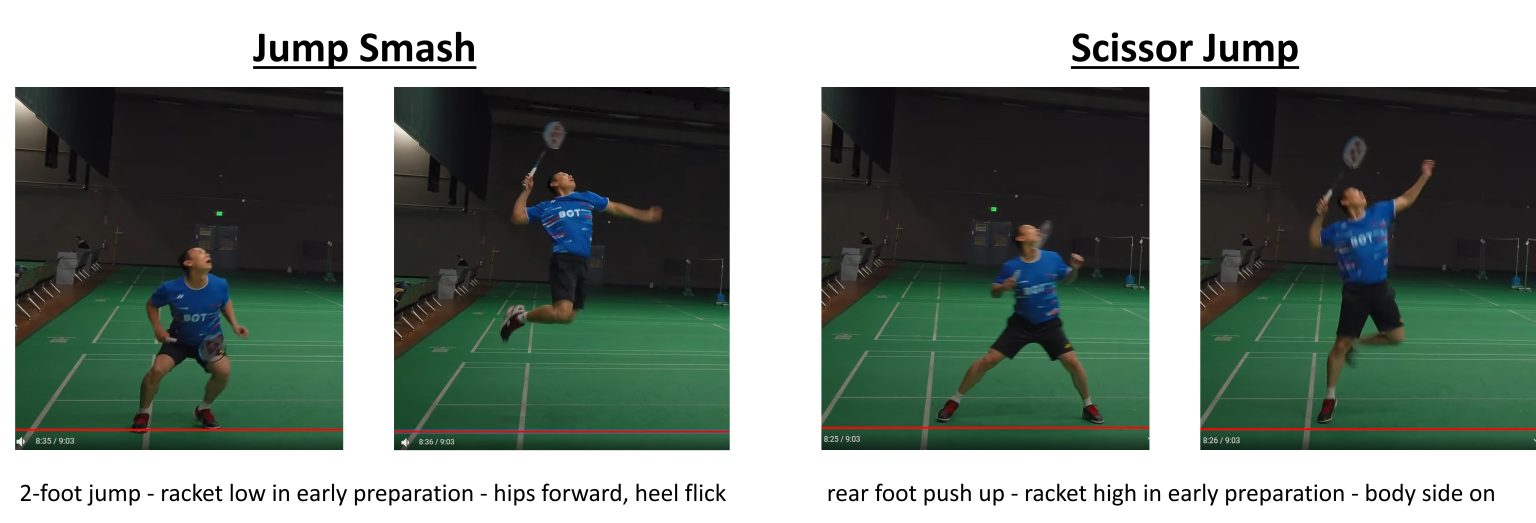
Tony Gunawan explains the differences
between a jump smash and a scissor-kick
Preparation : your take off stance
This advice may be different from what you have been told
It may even come as a shock to you, but hopefully, you’ve been experimenting with what works and what doesn’t.
The take-off stance for a great jump smash is not the same as for an overhead smash.
Look at all the pictures in this post that show the body position prior to the vertical jump
Do you agree with these points?
- Both legs are used to generate the power, not just the rear leg
- The width of the stance is not as wide as that for a scissor-kick smash
- The movement backward into this stance is more often with a running (walking) style rather than a chasse
- There is certainly a pause, a moment when everything is aimed at pushing into the ground with both legs prior to exploding vertically
- Players seem to “Sink then explode!” with all the rotation in the air, after jumping
Preparation : racket position
Its low
As with the take-off stance advice, you may find this advice about your racket position different from the position you are currently using for your overheads.
It may even come as a shock to you, but hopefully, the pictures in this post and the players you watch on YouTube will convince you to at least try it out.
In preparation, your racket will move much lower than you may realise.
It’s likely to be as low as your waist height

It’s vital that before you start your jump, your racket is “pulled” downwards
This is essential to load your legs!
Moving backwards with your racket around your head height in a classic overhead position that will limit the vertical height you can achieve.
If you are not sure, experiment with the racket in the 2 postion: low in preparation or high around head level. Can you feel a difference in your jump?
Alternatively, jump to the end of the post and watch the video from Peter Rasmussen.
What to do in the air
Once in the air, try these ideas
- In preparation , keep your shoulders facing the side of the court
- Imagine flicking your heels upwards. Look at the pictures in this post.
- At the same time the heels are being flicked up, quickly turn your hips forward and square to the net
- At this stage, the acket will be somewhere around your head height, possibly behind your head, prepared to throw
- Start your throw, feel the tension in your torso (especially your stomach), allow your legs to straighten as you deliver that awesome smash power
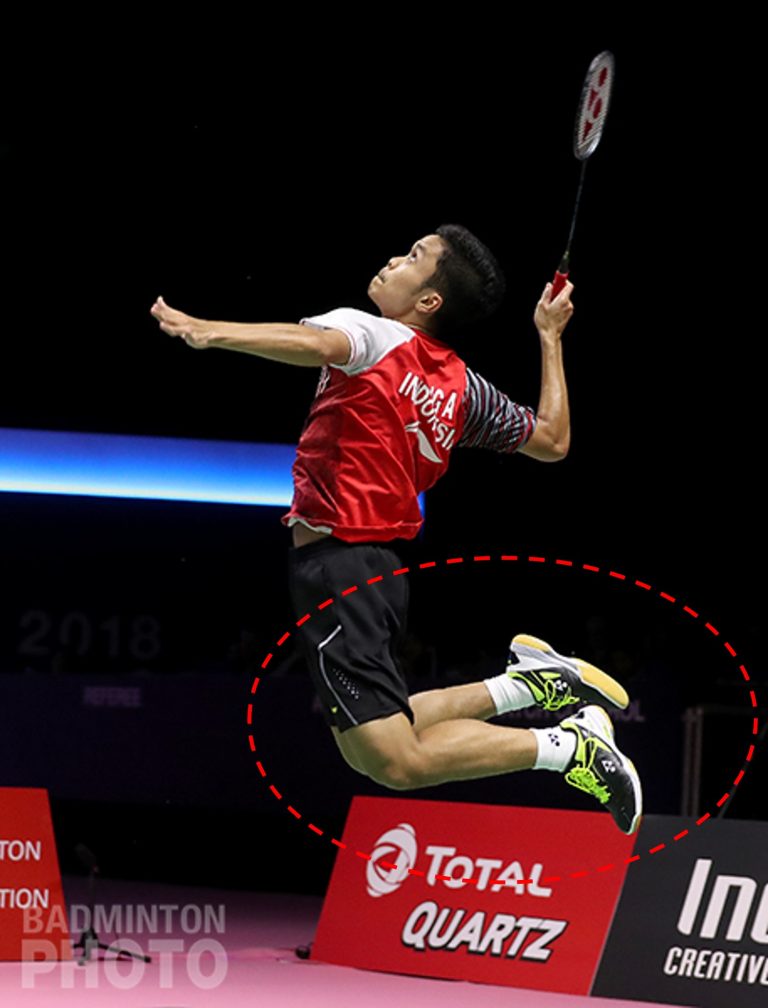
The turning and pushing the hips forwards which will create the heel flick
Both movements are the key to producing power
The grip on impact
“Squeeze the fingers” together just before impact
“Squeezing the fingers” will close the gaps between the fingers and cause the thumb to slip downwards towards the fingers.
Your grip may look strange if you do it now, however, it will deliver the power that you need!
The timing and amount of “squeezing” will need to be practised. It is not holding it as hard as you can, but it may be tighter than you imagine
The position of the hand can also be varied. Some of the most powerful smashes I have seen use a slightly “panhandle” grip.
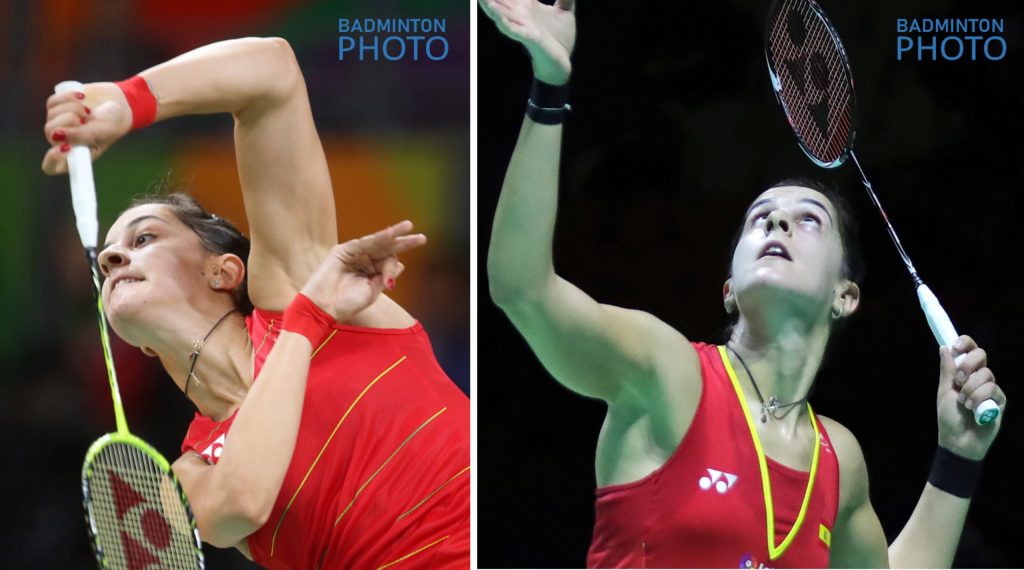
Watch Peter Rasmussen a World Champion
This is a great way to improve your jump smash.
Peter Rasmussen was a great player. His movements are powerful and fluid, and there are plenty of examples.
If you like to watch Peter in action, then I’d recommend that you take time to watch the final of Men’s Singles from the 1997 World Championships. Click here to watch.
Send me a Question
I’m always grateful if you have read this far.
If there is anything that you have read that has helped, or that you disagree with, then please send me an email.
It would be great to hear from you contact@badmintonandy.com

![Introducing the badminton overhead – Challenge No.3 - Duplicate - [#36874]](https://badmintonandy.com/wp-content/uploads/2023/05/Badminton-Forehand-Overhead-3-scaled-1.jpg)
![Introducing the badminton overhead – Challenge No.2 - Duplicate - [#36821]](https://badmintonandy.com/wp-content/uploads/2023/05/Badminton-Forehand-Overhead-2-scaled-1.jpg)
